Mold growth in walls can be a serious issue, impacting both the structural integrity of your home and the health of its occupants. Knowing how to effectively remediate mold in walls is crucial for maintaining a safe and healthy living environment. This guide outlines the essential steps and considerations for successful mold remediation.
Assessing Mold in Walls
Before starting remediation, it’s essential to assess the extent of mold growth in your walls. Look for visible signs of mold, such as discoloration or musty odors. Use a moisture meter to detect hidden moisture sources that may be contributing to mold growth. Assessing the severity of the mold problem will help determine the appropriate remediation approach.
Preparation for Remediation
Preparing for mold remediation involves taking necessary precautions to ensure safety and effectiveness:
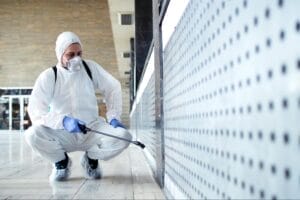
- Protective Gear: Wear protective clothing, gloves, and a respirator mask to avoid exposure to mold spores.
- Containment: Seal off the affected area with plastic sheeting and tape to prevent mold spores from spreading to other parts of the home.
- Tools and Supplies: Gather tools such as a utility knife, scrub brushes, HEPA vacuum, and cleaning solutions like mold remover or detergent.

Steps to Remediate Mold in Walls
Follow these steps to effectively remediate mold in walls:
- Identification: Locate all areas of mold growth within the walls, including behind wallpaper or drywall.
- Containment: Create a containment area using plastic sheeting to isolate the work area.
- Removal: Remove mold-infested materials such as drywall, insulation, or wallpaper. Double-bag and discard them according to local regulations.
- Cleaning: Scrub mold off hard surfaces with a mold cleaner or detergent and water solution. Use a HEPA vacuum to clean surfaces and remove mold spores.
- Drying: Ensure all cleaned surfaces are thoroughly dried to prevent mold regrowth. Use fans and dehumidifiers if necessary.
- Prevention: Address the underlying cause of mold growth, such as fixing leaks or improving ventilation. Consider using mold-resistant materials for repairs.
Professional vs. DIY Remediation
While some small mold problems can be tackled with DIY methods, larger or extensive mold infestations often require professional remediation. Professionals have the expertise, equipment, and experience to handle mold remediation safely and effectively, ensuring thorough cleanup and preventing future mold issues.
Health and Safety Considerations
During mold remediation, prioritize safety to protect yourself and others from potential health risks:
- Respiratory Protection: Wear a respirator mask to avoid inhaling mold spores.
- Ventilation: Ensure adequate ventilation in the work area to minimize exposure to airborne mold particles.
- Cleanup: Clean tools and protective gear thoroughly after use to prevent mold spores from spreading.
- Consultation: If you have respiratory conditions or allergies, consider consulting a healthcare professional before beginning remediation.
After Remediation
After completing mold remediation, monitor the treated area for any signs of mold regrowth or moisture issues. Address any remaining moisture problems promptly to prevent mold from returning. Regularly inspecting your home for leaks, improving ventilation, and maintaining indoor humidity levels can help prevent future mold problems.
How to Remediate Mold in Crawl Space
For a detailed guide on remediation techniques specific to crawl spaces, explore our comprehensive article on How to Remediate Mold in Crawl Spaces. Implementing these strategies is crucial for maintaining a mold-free environment throughout your home.